InstaHaul
  • Introduction
  • Usage Flows (FlowCharts)
  • Firebase
    • Firebase
    • Firebase firestore database
    • Firebase Security
    • Firebase Storage
    • Firestore indexes
    • Chat & Live tracking
  • Backend
    • Prerequisite
    • VPS/Shared Hosting
    • Installation
    • Composer & Node Packages
    • Database Configuration
    • GUI Installer
    • Timezone
    • Firebase
    • Web Notification
    • Firebase Forgot password
    • Change Backend Color
    • Reskin Mobile App
    • Terminal
      • Commands
    • Screenshots
    • Order schedule
    • CRON job
    • Clear Data (Users/Orders etc)
    • Email Server Settings
    • SMS Gateway
    • Payment Gateways
    • Webhooks - Payment gateway
    • Language / Translation
    • HOW TO UPDATE
    • In-App Live chat/support
    • Geocoding and Place search
    • Features
      • Firebase/Notification Delay
      • Fleet Management
      • Loyalty points
      • Home Screen Design
      • Featured Vendors
      • Trip recalculation/Outstanding payments
      • Switch between Taxi/Regular Driver
      • Data Translation - Backend
  • Flutter App
    • Getting Started
    • Steps
    • Directory Structure
    • Change App Name & ID
    • Change App icon & splash
    • App Color / Theme
    • Connect To Backend
    • Firebase
    • Firebase Auth - Phone
    • Firebase Phone OTP - Android
    • Firebase Phone OTP - iOS
    • Firebase Notification iOS
    • Share link - Firebase dynamic link
    • Social Media Login
      • Google login
      • Facebook Login
      • Sign-In with Apple
    • Google Map
    • Change App Language
    • Notification Sound
    • Custom Translation
    • Change App Font
    • Running on VS Code
    • Running on Android Studio
    • Generate Android Release App
    • Upload to Apple App Store
    • Screenshots
  • Demo Accounts
  • FAQs
    • Backend Image not working
    • Backend Backup not working
    • Upgrade without losing data
    • Backend Rollback
    • Blank Home screen
    • Custom Token
    • Product price zero(0) in details
    • Auto-cancel Not working
    • Pharmacy vendor
    • Vendor default rating
    • App logins
    • Error ==> type 'String' is not a subtype of type 'int'
    • NDK version error
    • Push Notification
    • Delivery Zone Map error
    • HOW TO UPDATE ADMINEND
    • Driver app rejected by Google
    • Cron job error
    • Auth pages Not working - App
  • HOW-TO
    • Onboarding Settings
    • Earning
      • Drivers
    • Enforce CASH Payment For Delivery Fee Only
    • System Contact Email
    • Driver Matching Flow
  • Extensions
    • Driver tracking extensions
    • Paymongo Gateway
    • Mercadopago Gateway
    • Nagad [Bangladeshi]
    • Instamojo - Payment
    • Paytrail
    • Paymaya Gateway
    • Emailer
    • External Notifier
      • Slack Setup
      • Telegram Setup
  • Upgrades
    • How to update
    • Important: Backend VPS/Shared hosting
    • 1.0.1
    • 1.1.00
    • Change logs
Powered by GitBook
On this page
  • HOW TO INSTALL
  • Install the require package
  • HOW TO GET PAYMONGO GATEWAY KEYS
  • HOW TO SET KEYS ON BACKEND
  1. Extensions

Paymongo Gateway

PreviousDriver tracking extensionsNextMercadopago Gateway

PayMongo is the easiest way to get paid online. Create an account in minutes and start accepting credit cards.

You can setup for an account by visiting the link:

HOW TO INSTALL

Here are the steps needed to have paymongo installed on your server.

  1. Go to extensions menu on your backend

  2. Click on Install button, and import the installer zipped file from the unzipped file that you downloaded

  3. After installation, copy the folders in the vendor folder inside the downloaded paymongo file, then upload the folders to the vendor folder on your server

Install the require package

Login to your cpanel or the server manager software you have, go to terminal and run the command below:

composer require luigel/laravel-paymongo

NOTE:

After installing the paymongo extension on your server, you have to configure the paymongo gateway.

You will need to copy and paste your public_key and private_key from your paymongo account and insert it into the provided input in your paymongo gateway settings in your backend.

HOW TO GET PAYMONGO GATEWAY KEYS

  • Click developers menu

  • You will be shown a page where you can copy your private and public keys

HOW TO SET KEYS ON BACKEND

  • Go to payment methods in your backend

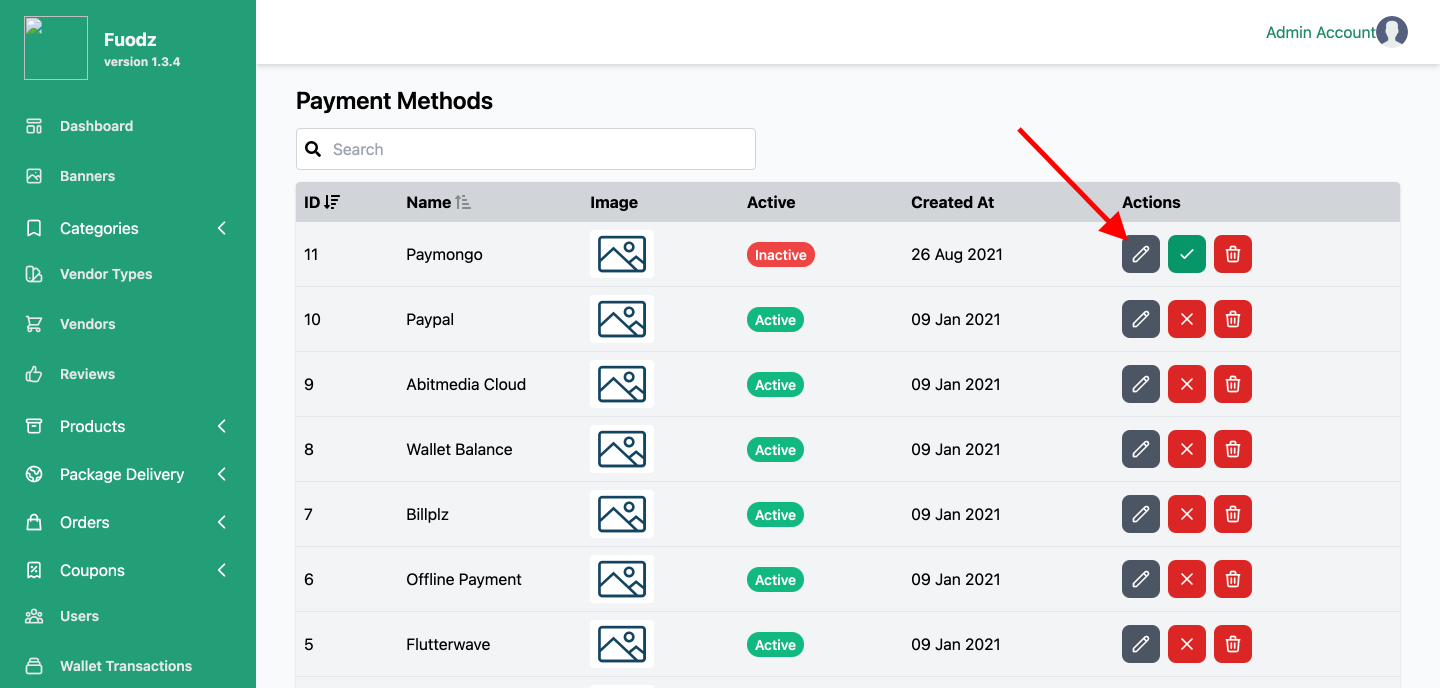
You can set keys, check Active and save it. Hurray you now have paymongo as a payment gateway

Buy/Download the extension from

Login to your paymongo dashboard

https://setup.edentech.online
https://dashboard.paymongo.com/
https://dashboard.paymongo.com/signup